Windows Docker - First Run a Container
We’ve installed the WIM for the Container base Image, then we can see it from:
| |
Here, we will do following:
- Use “WindowsServerCore” base Image to create a Container
- Start the Container
- Enter into the Container
- Read some basic information
- Make changes on folder and files
- Mark around with Registry
- Windows feature install or removal
- Exit from the Container
- Stop the Container
- Start it again
- Check values
- Stop and remove
There was something stupid I did for this Lab: I deleted system files, a lot…. and trying to install Windows Feature IIS and didn’t get successful. So I have to use a new Container to do the demo, that’s why you can see the Container ID is different from previous pic. So please be careful when you are trying delete system files. :)
Hopefully this will give you an idea about what container is and why do we need it…
- We are creating a new Container by using the Container base Image:
| |
- Check the Container’s state
| |

- Start the Container
| |
- Check the Container’s state again
| |

- Enter into the Container with default user
| |

- Enter as Admin
| |

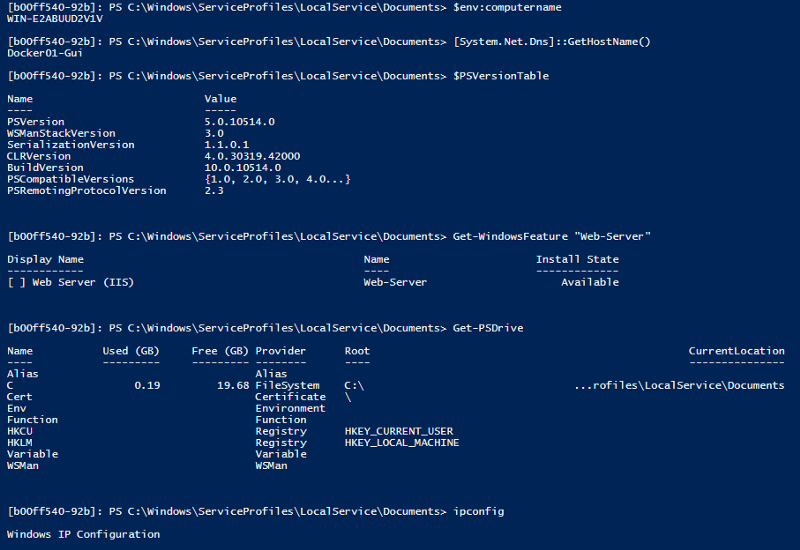
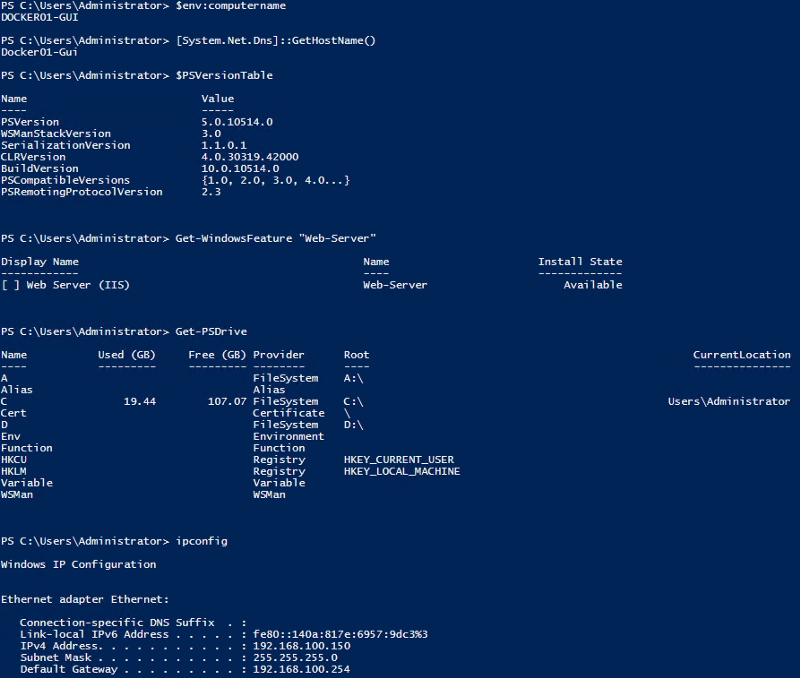
- Get some basic information inside and outside of this Container (Do compare)
| |
Running inside of the container:
Running out of the container:
- Simply delete some random files… or make some random folders in C:
You will find the file system is totally seperated between host and container
- Delete heaps things in HKLM:\Software:
| |
Same as above, the registry is totally seperated as well
- Install IIS feature in Container

Exit Container -> Exit
Stop Container
| |
- Start Container again, Check the value

- Remove Container
| |
This is the basic operation for Container in Windows. As you can see, it’s a application level virtualisation technology. Next time, I’ll do some basic performance test to show how quickly we can bring up an application. :)
 Running out of the container:
